Venues & events / WORKED EXAMPLE
Market Hall, Charleston — modelled from photographs
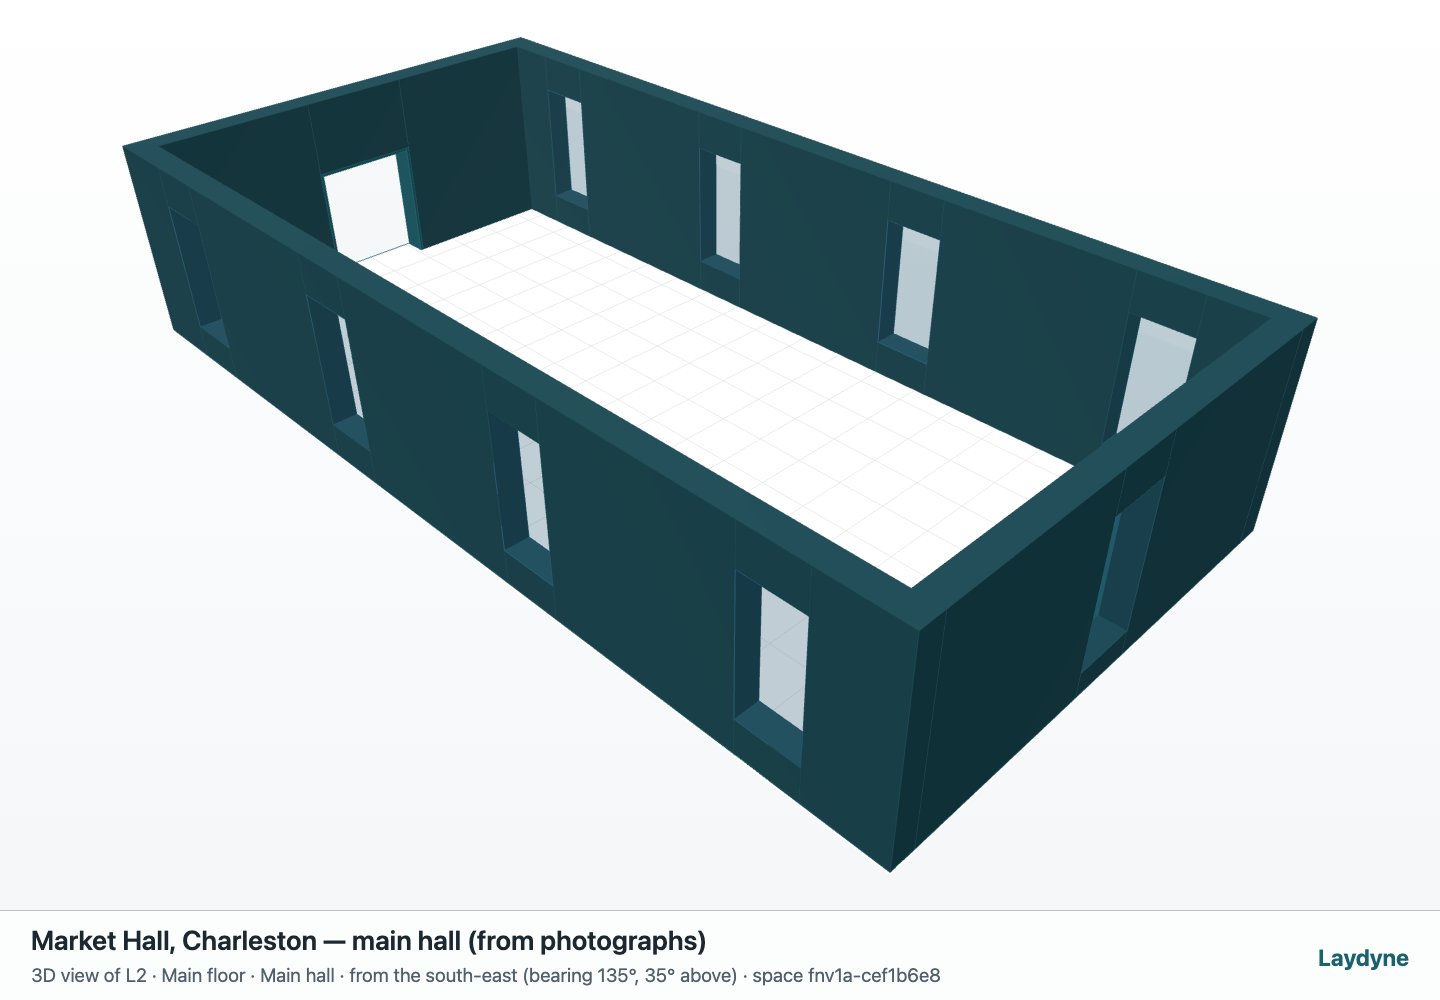
The main hall of a real market building, modelled from ten interior photographs: walls, windows, doors, stage and coved ceiling, checked by drawing the model from each photograph’s viewpoint.
Open and edit this layout without signing in. Sign in to connect your own AI. Save a project file to keep your changes.
How far do interior photographs alone take a 2D plan and a 3D model, and how far off are the sizes?
- Who uses it
- Anyone with photographs of a space and no drawings
- How it can create value
- Get an editable model of an existing room from photographs, then correct it with a single measurement instead of a survey.
- Bring your site data
- Interior photographs (exterior ones give only the shell), one known size if you have it, and the measured drawings only to check.
01 / SETUP
A model you can inspect.
A real room, not a synthetic one: the upper hall of Market Hall, 188 Meeting Street, Charleston, from ten public-domain HABS photographs, nine of them published here. An AI agent estimated 19 × 9 m inside the walls, a cornice at 4.2 m and a flat ceiling at 5.8 m, placed four windows in each long wall, the west double door, the east window-door to the balcony, the stage and a coved ceiling, and built it through ordinary MCP tool calls. Rendering the model from each photograph’s estimated camera showed the hall too wide and the windows too low, and one correction followed. The measured drawings, opened only afterwards, give 17.17 × 9.42 m and a 6.83 m ceiling.
Change one thing
Give the model one measured size, such as the hall’s 9.42 m width, and scale the rest; or add the vestibule and the porch from exterior photographs.
Read the consequence
Compare the model with each photograph from the same camera, read the plan’s dimensions and check the clearances.
View the starting inputs
- Hall length (m, estimate)
- 19
- Hall width (m, estimate)
- 9
- Flat ceiling height (m, estimate)
- 5.8
These dimensions are assumptions for the example.
02 / LAYOUT CHECKS
Dimensions and quantities
- Hall inside the walls (estimate)
- 19 × 9 m
- Measured on the HABS plan
- 17.17 × 9.42 m
- Windows in each long wall
- 4
- Flat ceiling (estimate / measured)
- 5.8 / 6.83 m
- Floor area drawn (m²)
- 200
These sizes were estimated from photographs before the drawings were opened: the model shown is off by 4–27 % on its main dimensions and 31 % on the window width. Give the model one measured dimension, or the drawings, before using it for anything that depends on size.
03 / FROM PHOTOGRAPHS
A real hall from ten interior photographs: four of them beside the model from the same viewpoint
No drawings were used. An AI agent read the interior photographs, took its scale from a door leaf, the window panes and the ceiling panels, built the walls, windows, doors, stage and coved ceiling with ordinary MCP tool calls, and drew the model from each photograph’s estimated camera (get_view_image with eye, target and fov) to see where it was wrong. The photograph is on the left, the model from the same viewpoint on the right.
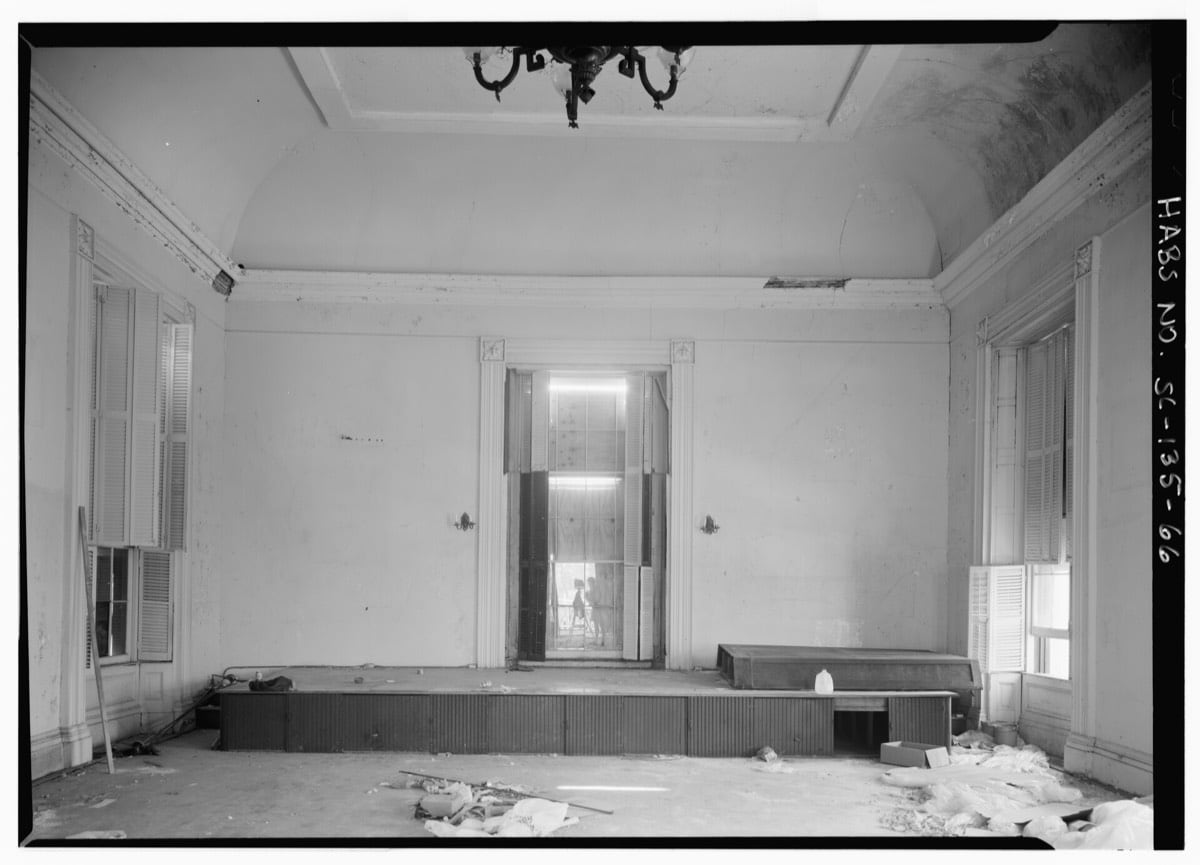
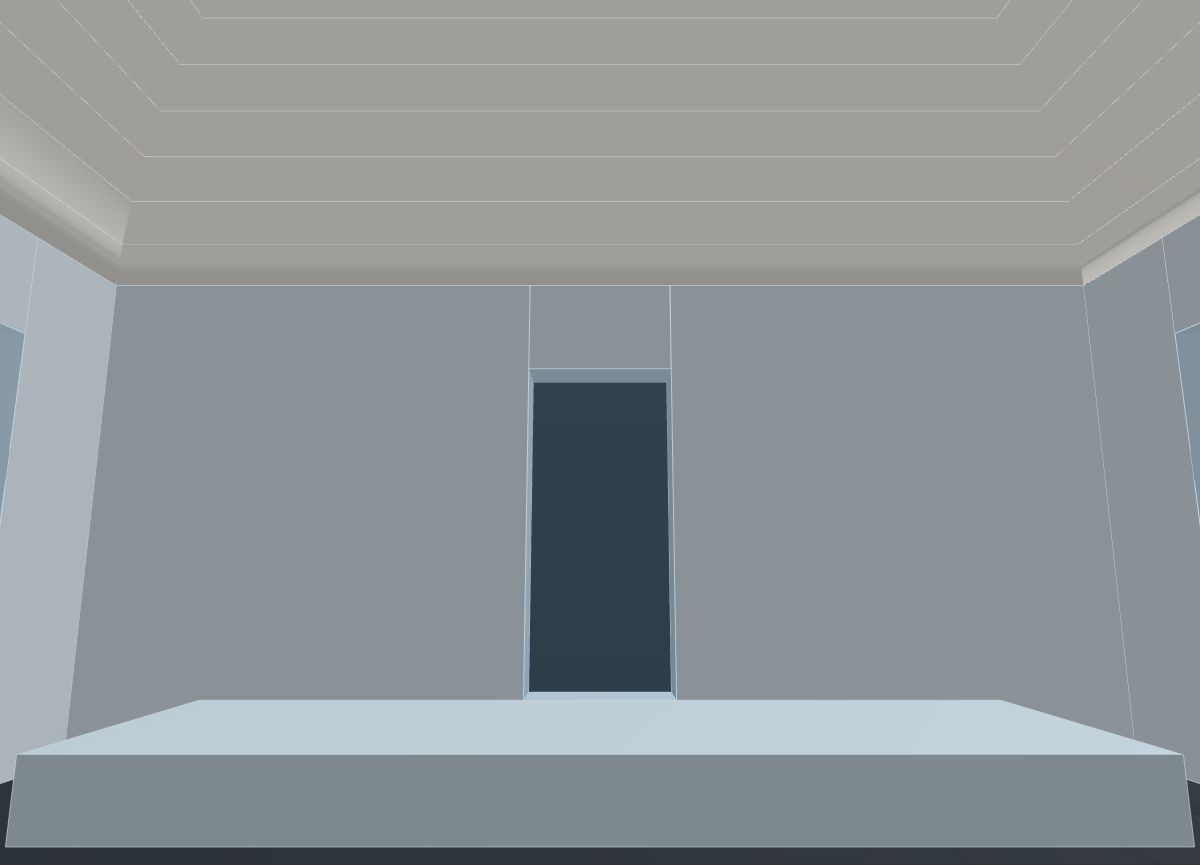
The east wall and the stage, seen from the middle of the hallCamera: eye at (12.3, 1.5, 5) m, looking at (20, 2.9, 5) m, 56° field of view. Photograph: Historic American Buildings Survey, Library of Congress, HABS SC,10-CHAR,6-66. No known restrictions on images made by the U.S. Government. 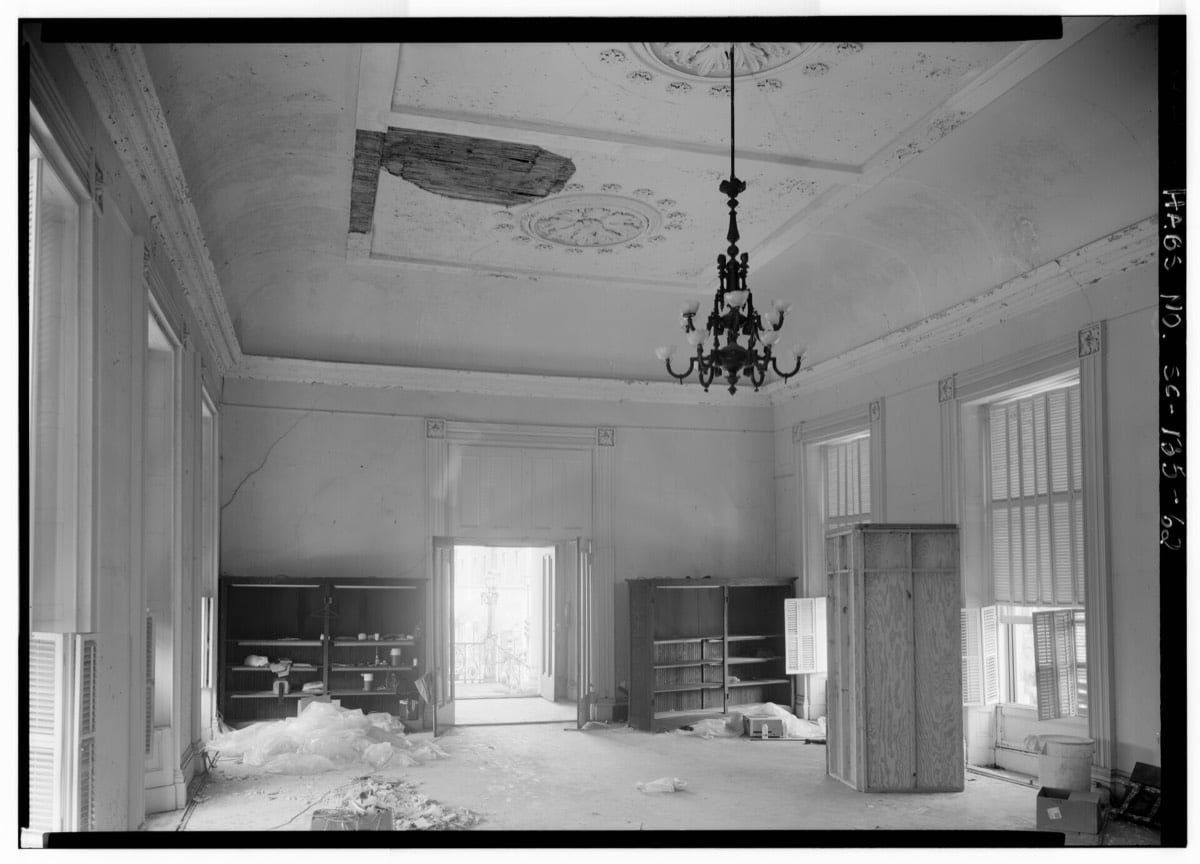
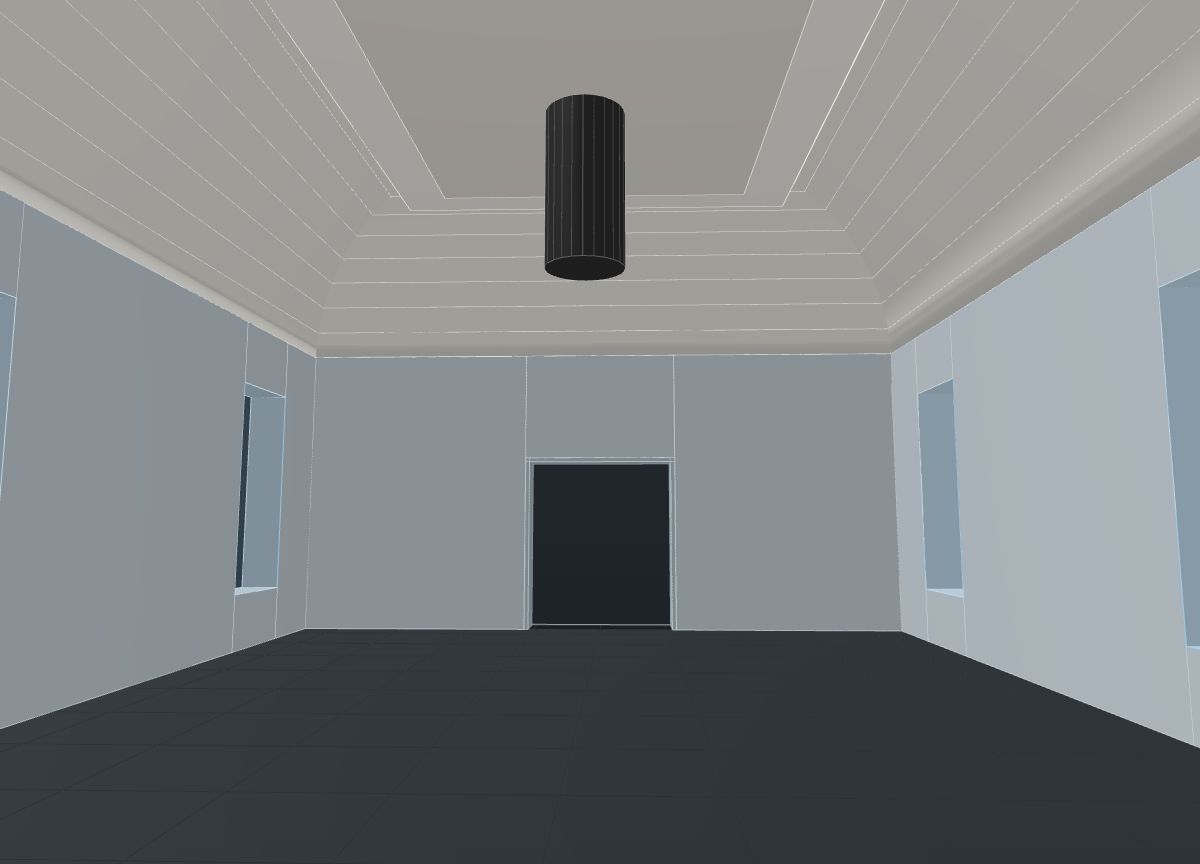
Looking west to the entrance, with both long wallsCamera: eye at (13, 1.6, 4.6) m, looking at (0.5, 3, 5) m, 56° field of view. Photograph: Historic American Buildings Survey, Library of Congress, HABS SC,10-CHAR,6-62. No known restrictions on images made by the U.S. Government. 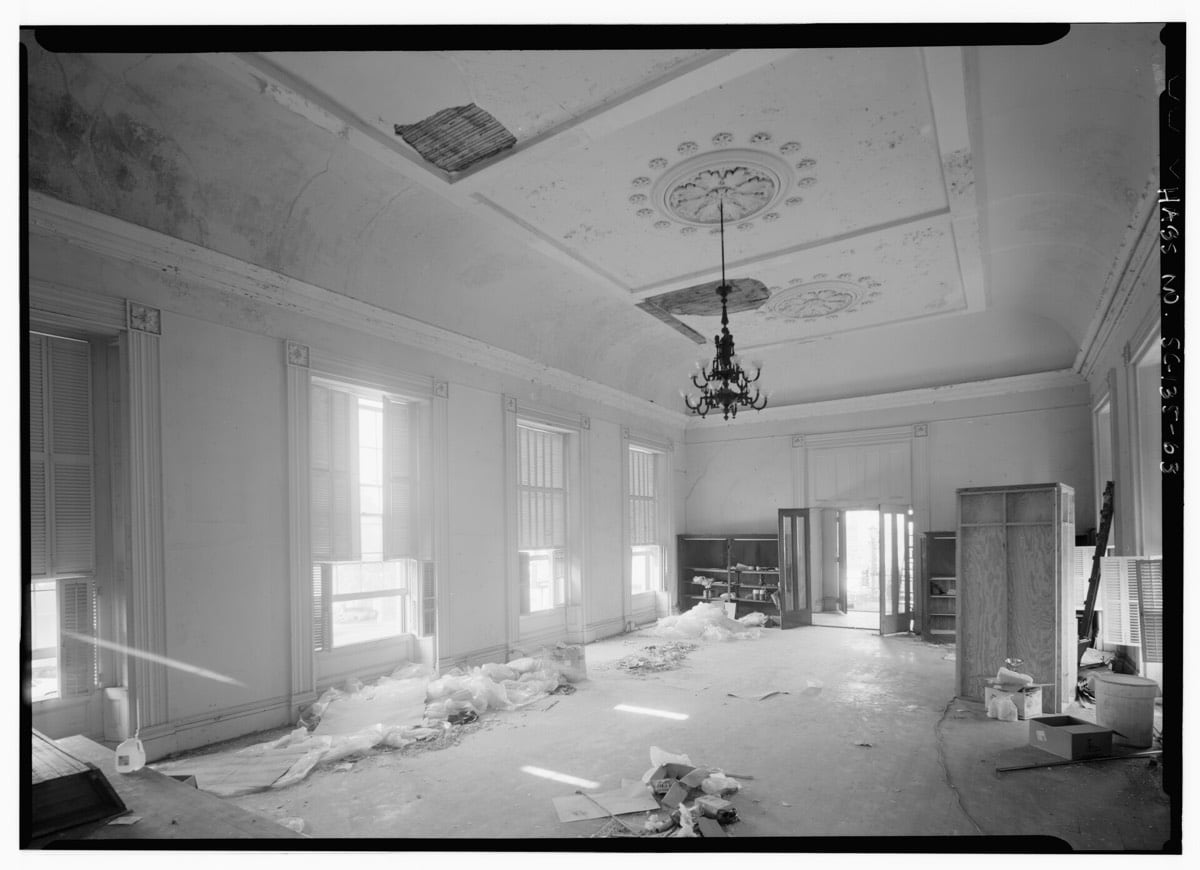
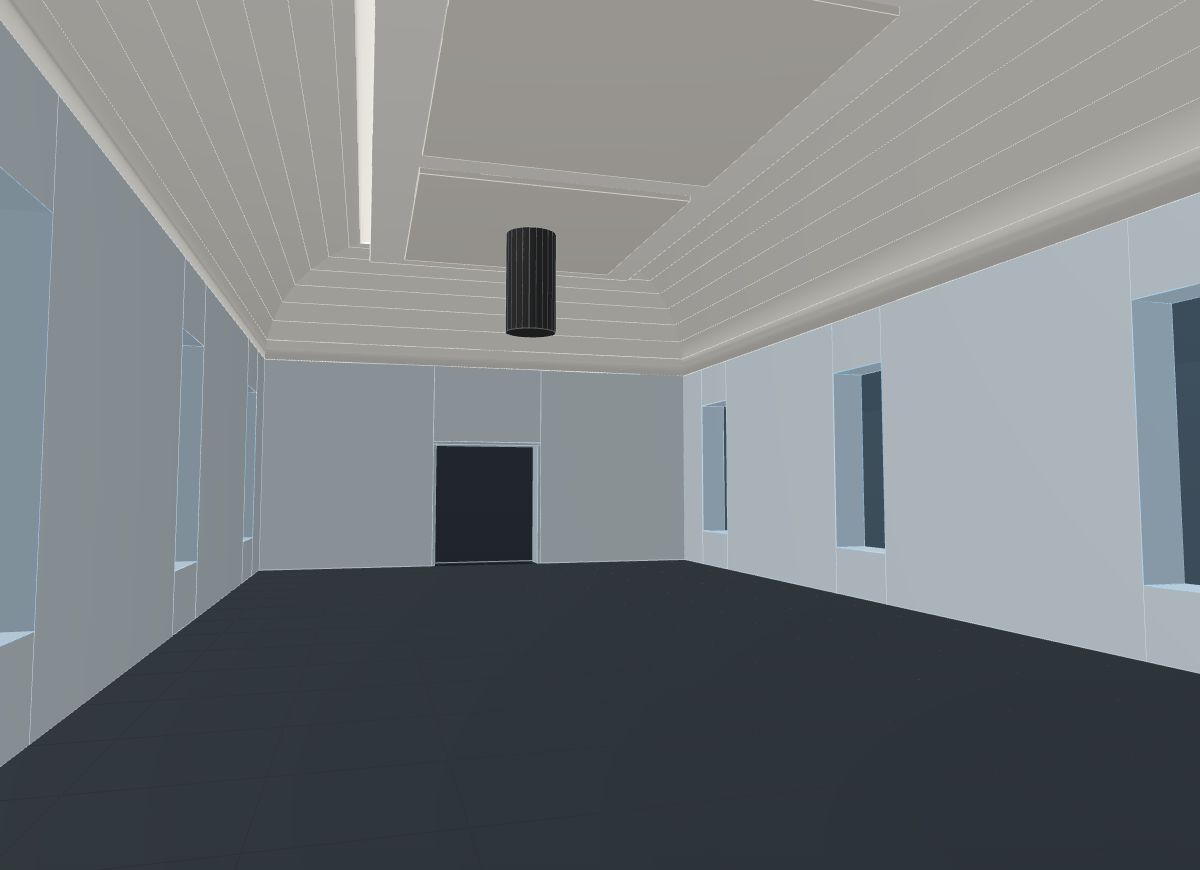
The west wall and the north windows from the east endCamera: eye at (18, 1.6, 7.5) m, looking at (0.5, 2.8, 2.5) m, 56° field of view. Photograph: Historic American Buildings Survey, Library of Congress, HABS SC,10-CHAR,6-63. No known restrictions on images made by the U.S. Government. 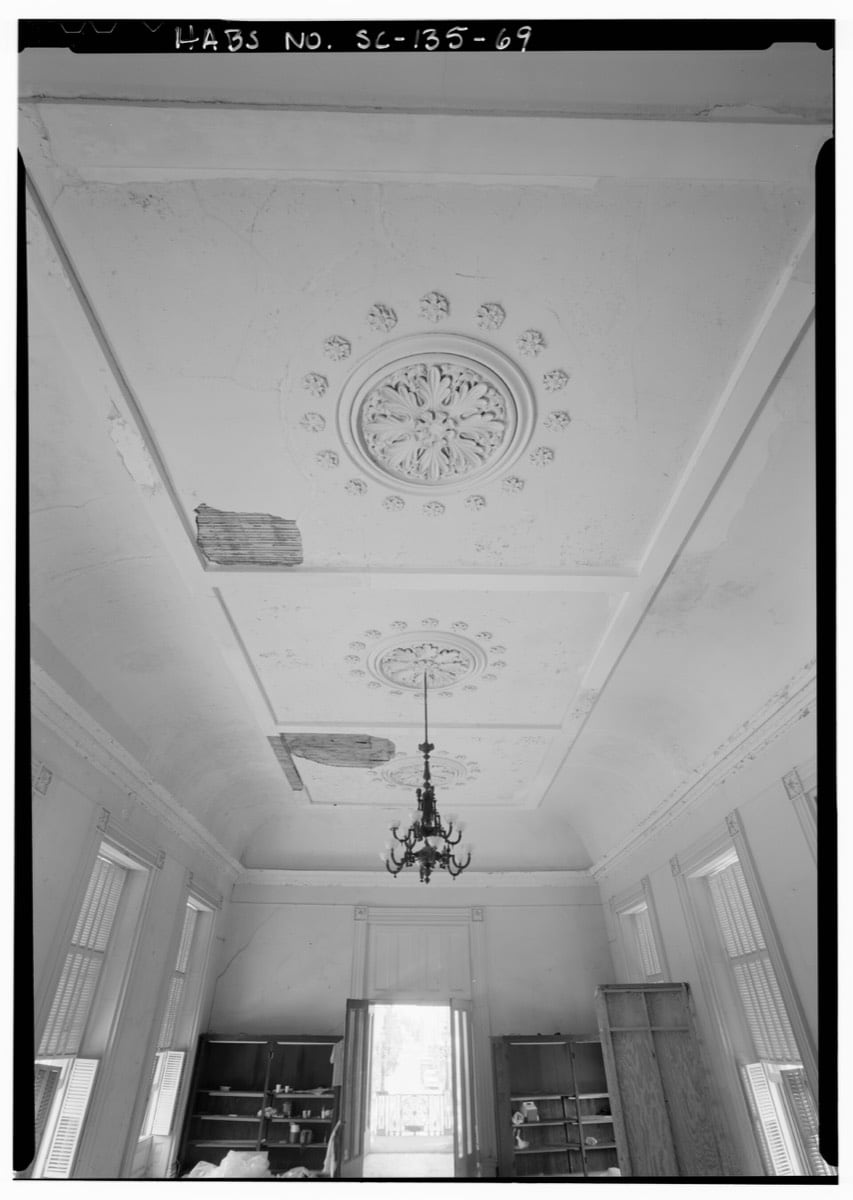
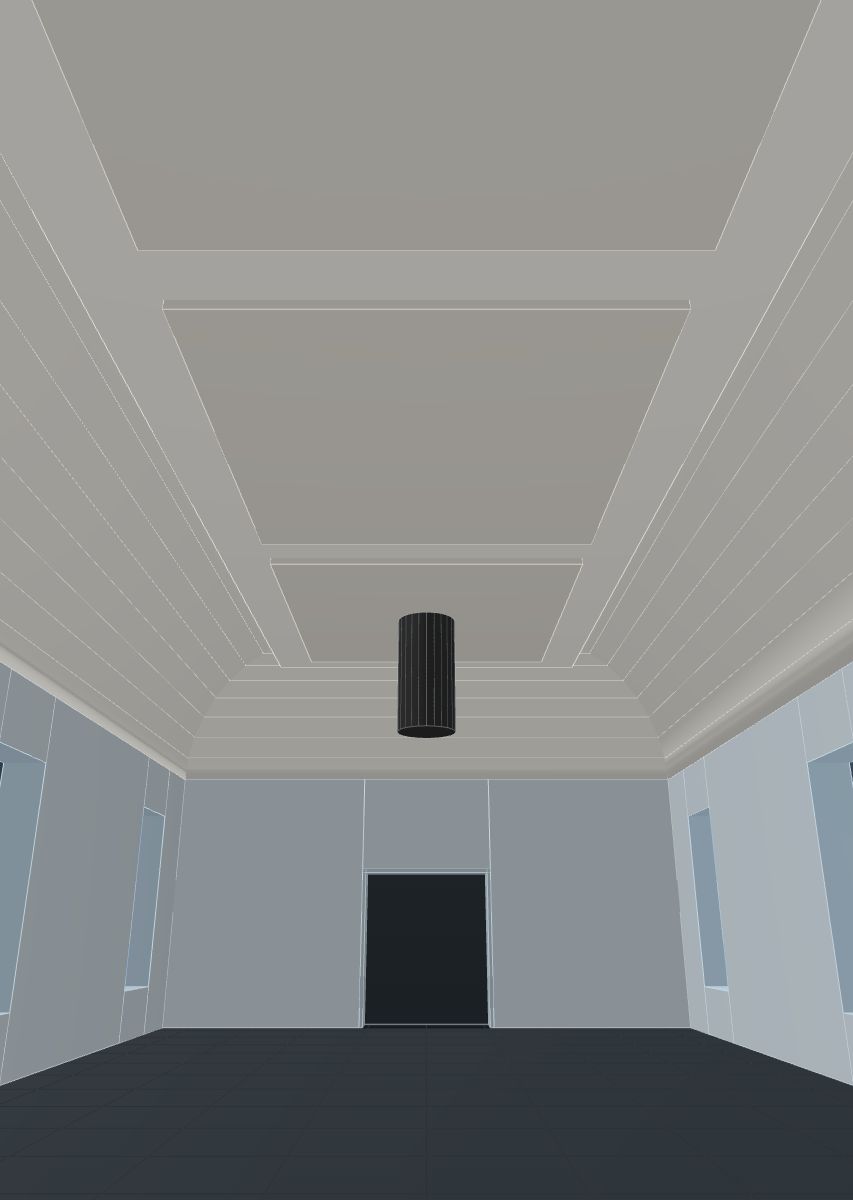
The coved ceiling and its three panels, looking upCamera: eye at (17.5, 1.5, 5) m, looking at (8, 5, 5) m, 67° field of view. Photograph: Historic American Buildings Survey, Library of Congress, HABS SC,10-CHAR,6-69. No known restrictions on images made by the U.S. Government.
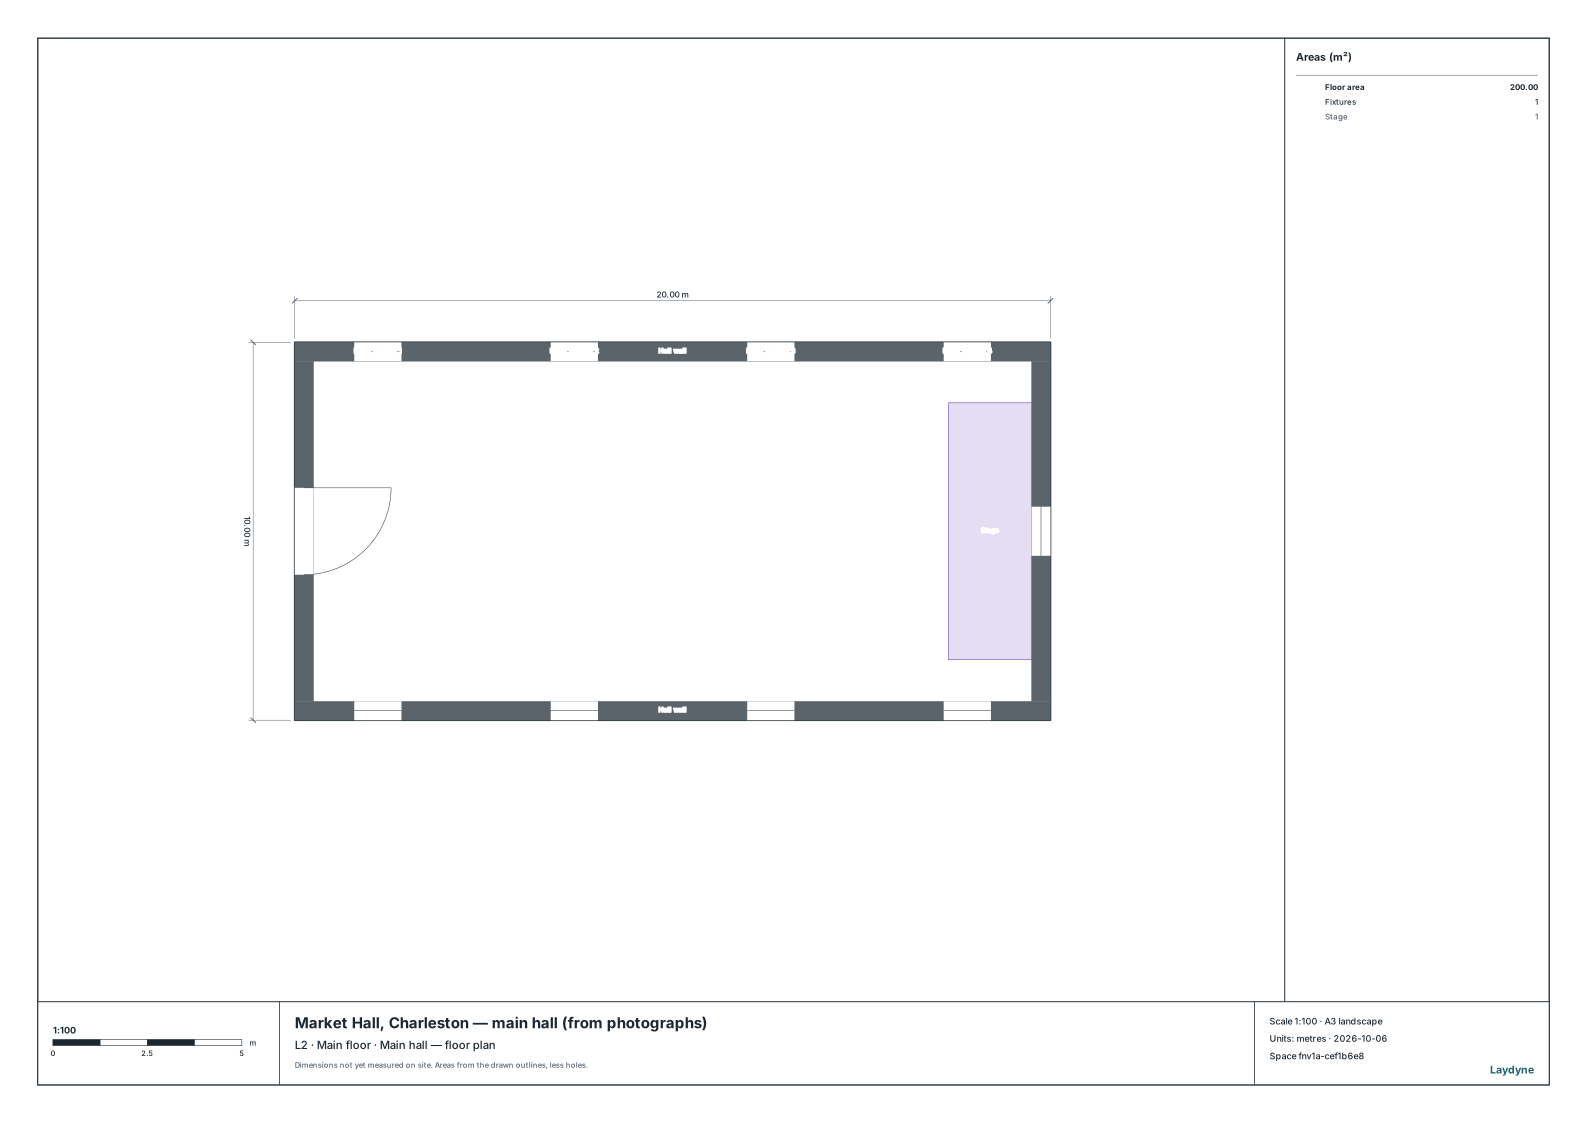
Against the measured drawings
The HABS main floor plan and section were opened only after the model was exported. The blind estimate (v1) was committed before any drawing was seen; the corrected model (v2) was not committed before the drawings were opened, so for v2 that order rests on the record’s own account. The model shown is v2, corrected from the photographs alone.
| Item | Measured (HABS) | Blind estimate (v1) | After the photo comparison (v2, the model shown) |
|---|---|---|---|
| Width inside the walls | 9.42 m | 10.0 m (+6 %) | 9.0 m (−4 %) |
| Length inside the walls | 17.17 m | 19 m (+11 %) | 19 m (+11 %) |
| Flat ceiling | 6.83 m | 5.6 m (−18 %) | 5.8 m (−15 %) |
| Underside of the cornice | 5.74 m | 4.1 m (−29 %) | 4.2 m (−27 %) |
| Windows in each long wall | 4 | 4 | 4 |
| Window glass width | ≈ 1.8 m | 1.4 m (−22 %) | 1.25 m (−31 %) |
| West door opening | ≈ 2.4 m | 2.4 m | 2.3 m (−4 %) |
Every height came out about a fifth low because the scale was taken from a window pane assumed 0.33 m wide; the real panes are about 0.6 m. One measured size, such as the door height or the hall width, would have corrected the whole model in proportion. Photographs alone give an estimate, not a survey.
Exterior photographs give the shell: the outline, the storeys and the openings in the façades. Rooms come from interior photographs, as here, where the agent builds what it can see and leaves the rest out: this model is the hall alone, without the vestibule, the porch or the ground floor.
Try it with your own photographs
Connect your AI to Laydyne, give it a few photographs of a room and, if you have one, a single measured size. Ask it to build the room, then to draw the model from where each photograph was taken with get_view_image and compare. The photographs above can be downloaded to try the same hall.
Downloads
HOW IT WAS BUILT
From ten photographs, through MCP
An AI agent read ten interior photographs of the hall (four are shown on this page; nine are kept in the record), estimated its sizes, built the model with ordinary MCP tool calls, drew it from each photograph’s viewpoint to compare, corrected it once and exported it. The measured drawings were opened only afterwards.
| Step | MCP tools | MCP calls |
|---|---|---|
| Ten interior photographs read (four shown on this page); width, length, cornice, ceiling, windows and doors estimated from a door leaf, the window panes and the ceiling panels, and written down before any drawing was opened | — | — |
| A fresh project; the walls to the cornice, eight windows, the west double door, the east window-door, the stage, the cove and the flat ceiling built from the estimate, then drawn from eight photographs’ viewpoints and laid beside them | get_space · create_space · apply_changes · get_view_image | 14 |
| The width, the window height and the cove corrected from the comparison; rebuilt as a fresh project and drawn again from the same viewpoints | get_space · create_space · apply_changes · get_view_image | 12 |
| The project exported, the 1:100 plan drawn and the floor checked: 0 issues | export_project · get_view_image · check_space | 3 |
29 MCP calls in all; the drawings were opened only afterwards, to measure the error. Registering the public example from the same estimate took 25 calls, named save and reopen included.
04 / MAKE IT YOURS
Plan in 2D. Inspect in 3D. Keep the whole project.
- Open and adjust. Switch between 2D and 3D; edit a part, a floor or an input. Both views describe the same model.
- Connect your agent for free. Sign in, choose Connect AI and connect ChatGPT, Claude, Codex or Claude Code. Ask it to inspect the example, edit the layout and check a route.
- Save a checkpoint. Project → Project file, or ask the agent to export the complete project. Import it later to restore floors, scenarios, saved comparisons and the selected view.